In today’s data-driven world, applications have to communicate and exchange information quickly and effectively. Yet, how do we grant one service the access to another – authenticate and authorize it – without sharing our login credentials, and while protecting our data? OAuth 2.0 gives us some great options for that.
Do we just lock it and share the key?
Imagine you are going on vacation, and you need your garden watered, and your cat fed when you are away. You could just give a key to your house to somebody, but it would definitely not be the safest option. The key could be stolen, lost or copied (and used by people you’d never want near it), which would put your possessions (and the pet) in danger.
Sharing your password, just like sharing your key, is not what you want to do. There needs to be a better way.
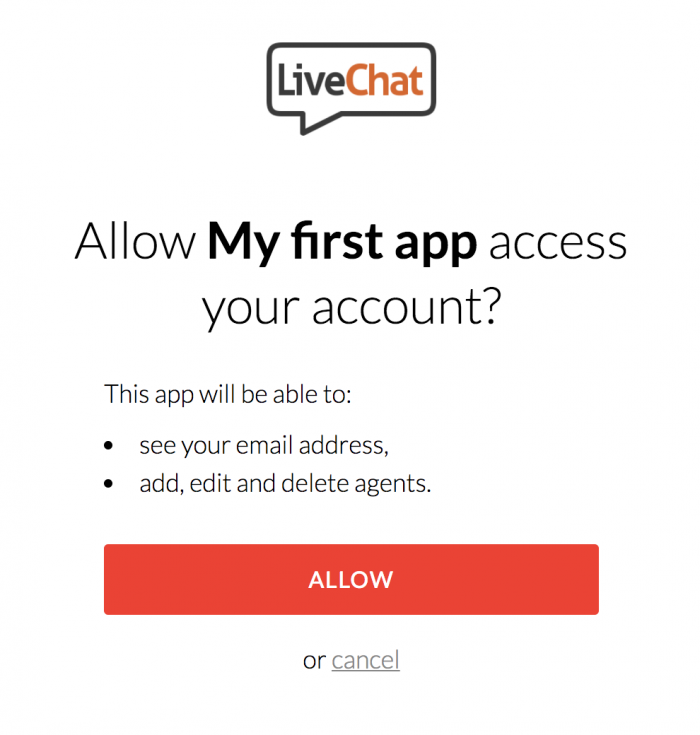
Luckily for us, the digital world has OAuth 2.0, which is the standardized framework that handles the authentication and authorization processes, making them easy to configure and very secure. Remember the window that pops up whenever you install or connect an app, and it requests access to some specific data? That’s where OAuth 2.0 takes over.

OAuth 2.0: like Security Cards with Access Codes
Let’s get back to the part with being away on vacation. Using OAuth 2.0 is like having several enclosed zones **in your house. Each zone is accessible separately with an access code (say, 4-2-2-0), and only contains the items that are needed to the person that you allow to enter. The gardener is allowed to enter the garden and the shed with garden tools. The catsitter can enter the hall, where they find the food and water for the cat. Each of them would have their own **security card, used to verify it’s them (authentication), and an access code, which will only work on the zones that they are allowed to enter (authorization)!
In the real world it’s no easy thing to get a house like this, but in the digital one this is all daily bread for app integration.
OAuth 2.0 can handle the authentication, and grants such “access codes” in the form of tokens, establishing what resources the requesting app is allowed to manage. When you create an app that needs to access some data in a LiveChat account, you can use OAuth 2.0, and the app will be able to obtain the necessary information while keeping the login credentials, as well as all other data, out of this process.
Getting OAuth 2.0 to work
Let’s take a quick look at how you can get OAuth 2.0 working for your LiveChat integration:
- To build an app which uses OAuth 2.0 for authorizing API calls, go to the Developer Console, and create a new application (select the app type, depending on your needs).
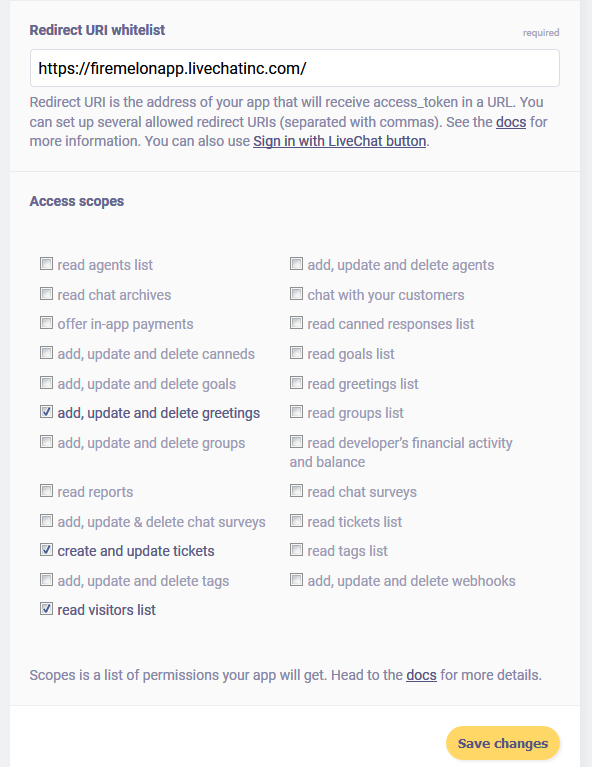
- Having done that, go to your app’s “Authorization” screen, fill out Redirect URI and define the scopes. This is where the magic happens: the scopes establish what resources in a LiveChat account your app will be permitted to access.

- Don’t forget to click “Save changes”. Your app now has its authorization flow set up. When coding, make sure that your app redirects its users to LiveChat OAuth Server, and can acquire the access token. For more details, see Authorizing API Calls.
That’s it! When your app is ready, users that wish to connect it with their LiveChat accounts will get the authorization prompt, which will reflect all that you set up here. After they click “Allow”, your app will be getting what it needs, while keeping the users’ login credentials safe. This way, you can have your app take advantage of OAuth 2.0, and allow it to access the exact data it needs while keeping the line both fully functional and secure.
Sounds good? You can learn whatever else you need about OAuth 2.0 and how to implement it at LiveChat Docs. Happy coding!